How to grow your own fruit and veg - a beginner's guide
There are so many benefits to growing your own, and you don’t need to be an expert to get started. You only need a little bit of spare space, and trust us, you’ll be pleased you gave it a go when you’re tucking into your home-grown goodies!
Whether you’re planting in allotments, or using whatever space you have available on patios, balconies or even windowsills, we’ll get you started with these simple steps.
 By Clare
- 27th Feb 2023
- 8min read
This blog was updated on 4th December 2025
1. Pick your seeds
Start by choosing what you want to grow and go for things you like to eat. Do you and your family love carrots with a roast, or lettuce on a fresh summer salad? Some of the easiest vegetables to grow include peas, runner beans, potatoes, onions and garlic, so choose these vegetable seeds if you want to start simple. Tomatoes - although not technically a vegetable - are one of the easy ones too.
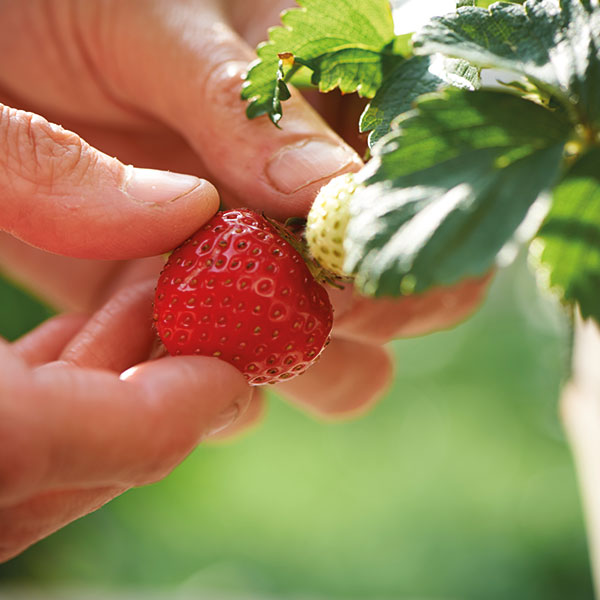
Fancy growing fruit instead? Why not grow strawberries? Nothing beats the taste of them when they’re home-grown, and you might be surprised to know they’re a really easy fruit to grow! If strawberries aren’t your thing, how about blackberries or raspberries?
Not sure you’re quite ready to tackle fruit and veg growing? Then start with herbs - they can be grown on a sunny windowsill. Just imagine, fresh basil for those pasta dishes and parsley and chives to enhance sauces and salads!
Check out our Vegetable Growing Calendar to help you decide what and when to grow. It’ll take you through the whole growing process from sowing seeds all the way to digging up veggies ready to cook for dinner.
2. Pick your compost
Get your seeds off to the best start by giving them quality soil to grow in. Choose a compost with good drainage, a fine texture and low nutrients to give your seedlings the best chance to grow. Most composts labelled ‘multi-purpose’ will be suitable for growing your own fruit and veg too. Our lightweight multi-purpose compost is peat-free, contains no green waste and is grown from fully sustainable sources.
Or make your own compost! Why not recycle the nutrients in your kitchen and garden waste and make your own compost for an extra boost? It’s a great eco-friendly (and budget-friendly!) way to tackle any waste. It’ll take a fair few months for your kitchen and garden waste to turn into usable compost, but it’s never too late to start! Check out our blog here that’ll show you how.

3. Planting and watering seeds
When you’ve chosen your seeds, the next step is to get planting! Head to our Potting and Planting Guide for more info on this. You'll need some pots to start your seedlings off in. Choose from plastic seed trays which you can wash and re-use again and again, or individual fibre plant pots which can be transferred straight into the ground once your seedlings are established. They'll naturally decompose once your seeds grow, making it even easier to get growing.
Top tip - remember to use plant labels so you know what’s what!
Go for a greenhouse
A greenhouse is warmer and provides a more constant temperature for your seedlings, meaning much more of them are likely to germinate and grow stronger. Greenhouses are also great for protecting your seedlings from pesky pigeons, mice, slugs and snails.
You don’t need lots of outdoor space for a greenhouse and they don’t have to cost the earth. Check out our range of PVC greenhouses and mini greenhouses here.

4. Give them room to grow
When roots begin to sprout out of the bottom of their pot or tray, it’s time to either transfer the plant outside (if the last frost has passed) or re-pot them into a larger plant pot. If you’re using plastic seed trays, carefully ease the seedlings out so you don’t damage the delicate roots.
Remember, if you’re transferring straight into the ground and you’ve used compostable fibre plant pots, you won’t need to take the plants out first. You’ll be able to pop them straight in the ground.
5. Feeding your plants
Now your seeds have turned into plants and have been rehomed, it’s time to give them a feed with fertiliser. Fertilisers are concentrated sources of plant nutrients, used to give plants an extra boost and improve flowering/veggie crops. They’re made up of three major plant nutrients:
- Nitrogen - for green leafy growth
- Phosphorus - for healthy root and shoot growth
- Potassium - for flowering, fruiting and general hardiness
Liquid concentrate - a concentrated formula that you add water to. One bottle will last a whole season so it’s a great money-saving choice.
Ready-to-use liquid - simply pour onto the plant as per instructions. This is great when you’re short on time and it’s also fast-acting.
Pellets – add these to your compost. They’re usually slow release and provide nutrients for the whole growing season.
When applying fertiliser, take care to avoid leaf contact, which can cause scorching. Make sure to not over apply either, as this can cause root damage and pollution of ground water.
Top tip - check the packaging on your plant food to make sure it’s suitable for use right up until harvest.
6. Watering your plants
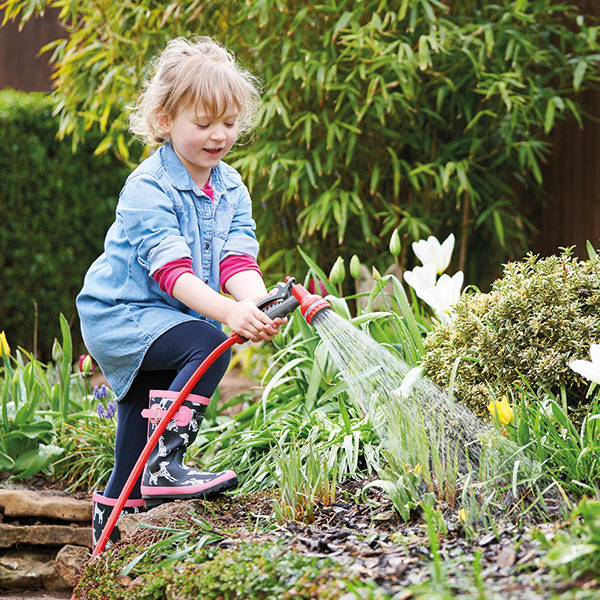
We might live in a rainy country, but when there’s a long spell of dry weather make sure you get the garden hose out and keep your plants hydrated (if there’s no bans in place, of course).
It’s important to avoid over-watering your plants. To stop your plants from drowning it’s best to attach a rose to the end of your watering can so the water can be evenly distributed.
When should you water plants?
For almost all plants, you should water them when the top inch of soil feels dry. To check if your plant needs watering just follow the finger dip test. Don't be tempted to over water. Over watering can be as damaging as under-watering.
Investing in a water butt is a great eco-friendly and cost-effective way to water your plants. Simply attach to your downpipe and collect rainwater you can then use to water your plants. Check out our blog on how to install a water butt for the full rundown.
7. Happy harvest and regrowth
Now all the groundwork has been done, it’s important that you take care of your crops until they're ready to harvest. But how do you know when’s best to pick your veggies?
Well, veggies all have different harvest times, so it’s best to keep a check on what was planted and when. Here’s a guide on how to tell when fruit and veg is ready for picking and pulling...
Beetroot, turnips and carrots
Beetroot and turnips can be pulled once the roots have reached a golf ball size. The bigger the roots, the tougher the veg will become.
Carrots can be dug up once they reach a suitable cooking size! Maincrop carrots love the ground, so can be left in the soil until you're ready to eat them.
Dig up your parsnips once the leaves have died, but if you can, wait until after the first frosts for a sweeter flavour.
Potatoes
Early new potatoes can be harvested around 10-12 weeks after planting. Pull back the soil to expose them to see if they're big enough to harvest. Once they reach the size of an egg, they're good to go!
Maincrop potatoes take a little longer - around 20 weeks. Do a skin rub check - if the skin doesn't rub off, they can be pulled. For more tips on tatties, check out our potato growing blog.
Onions, garlic and shallots
Harvest garlic, onions and shallots with a fork a week or two after the leaves have turned yellow. It's best to opt for a dry day to loosen them from the ground. After lifting the bulbs, leave them on the soil surface for a couple of days or until they've fully dried - keeping an eye on the weather! Bring them indoors if bad weather is forecast.
Peas and beans
Have a feel of the pods, and shell a couple to check they've developed to a good size inside.
Peppers and tomatoes
They’ll be ready once the skin colour is bright and even all over.
Cucumber
This is totally up to you! Pick them small for mini snacking cucumbers, or if you're planning on slicing them up for a big salad, leave them to grow larger.
Courgette
You can harvest courgettes a few days after they've flowered. Courgettes are prolific and will keep shooting out new flowers, so keep on top of harvesting to encourage new growth and more tasty veg!
Butternut squash
Be sure to protect these with a cover and leave them until the end of autumn. They'll be ready once the stem has died off.
Sweetcorn
These are ready to pick once the end tassels have dried up. Pierce a kernel with your fingernail or sharp object, if the liquid that comes out is slightly milky, then they're good to be picked.
Salad leaves
Heart lettuces are ready once the heart has become firm. For loose leaves, pick these as and when you fancy a salad when they're young.
Cabbages, broccoli and cauliflower
These can be cut once the leaves have formed a tight head. Broccoli and cauliflower should be picked when the buds are closed. Growing Savoy cabbage? Leave until after the first frost - they'll get even tastier over time!

Loved growing your own? Then it’s time to plan for next season! When it comes to the new harvest season, try to practise crop rotation. This is where you grow specific groups of veggies on a different part of your vegetable plot each year. It helps to reduce a build-up of pest and disease problems and is perfect for annual vegetables. Just remember to mark out what was grown in each plot so you don’t forget.
Happy harvesting!
Let us know what you choose to grow over on our social channels: Facebook, Instagram, TikTok & X.