Your ultimate guide to gift wrapping!
The festive season is well under way: the lights are up, the songs are on, and it’s getting towards the time of year where gift wrapping is the next job to tick off the list.
Wrapping presents is loved by some and dreaded by others. If you’re the type of person who groans at the thought of gift wrapping, this blog is for you!
At wilko, we think every part of the Christmas holidays should be enjoyed, which is why we’ve put together this handy guide to gift wrapping.
 By Alex
- 11th Dec 2023
- 5min read
This blog was updated on 30th October 2025
Before you get started
Leaving things until the last minute causes stress and untidy wrapping, so consider this your reminder to put some time aside in the coming weeks to focus on gift wrapping. It should only take one evening, depending on how generous you’ve been!
Give yourself more time than you think you’ll need, if possible. Stick some music on (Christmas tunes are optional), grab a festive tipple of your preference, and try and squirrel yourself away to a private room to avoid prying eyes…
Ideally, you want to wrap your gifts on a large table or clear yourself some space on the floor. Wrapping presents on a soft surface like a bed will result in crumpled wrapping paper and the risk of cutting holes in your duvet cover, which isn’t ideal.

Get organised
Before you get started on gift wrapping, you’ll need to get some gifts.
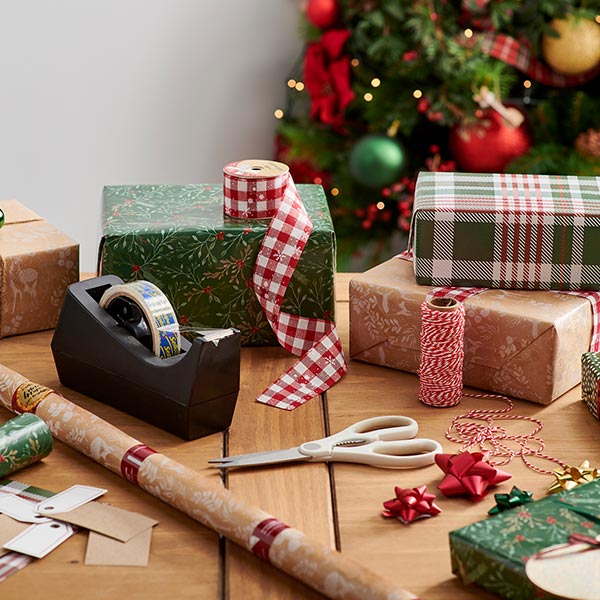
Once that’s sorted, you should get all your wrapping supplies ready. Here’s what you’ll need:
- Wrapping paper
- Scissors
- Adhesive tape
Optional
- Bows & ribbons
- Gift tags
- Barware (so you can make yourself a drink beforehand)
Your choice of wrapping paper is completely up to you, though we recommend choosing a different design for each recipient. This will make things much easier to organise and avoid any confusion if you forget who each present is for!
A tape dispenser is your friend in this instance. If you don’t have one, pre-cut some small lengths of tape and stick them onto the edge of your table for easy access later.
Step 1: how much paper to use?
There’s nothing worse when wrapping gifts than not having enough paper to cover the present.
To make sure this doesn’t happen, roll out a length of wrapping paper from the roll and use a weight to stop it from rolling back at you – this is where that drink you made earlier can come in handy!
Place your gift on the paper and rotate it down the length of paper, counting as you go, until it’s on its fourth side. If your gift isn’t box-shaped… we’ll get to that later.
You’ll want to cut about an inch further down from the edge of the gift. This makes sure that the paper will cover all 4 sides of your present with a little excess for overlap.
Step 2: cutting the wrapping paper
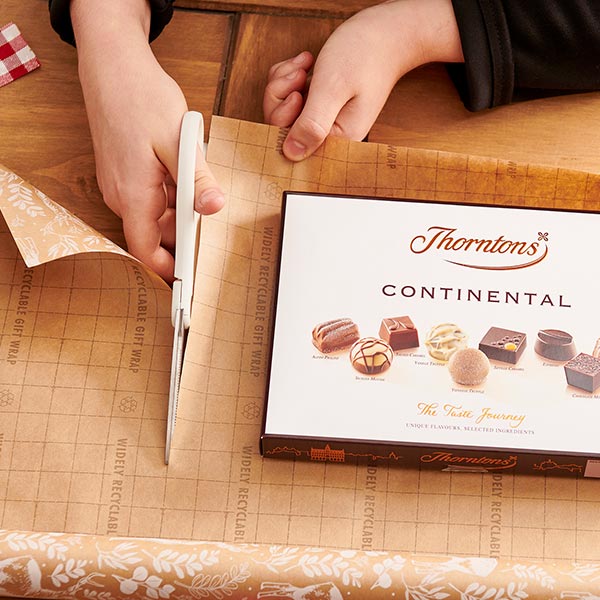
A lot of wrapping paper will have handy guidelines printed on the underside. If yours doesn’t, simply mark where your cut should be and fold the paper back over itself, making sure both edges meet, and press a line into the paper.
Next, take your scissors and carefully cut along the line, being careful of the sharp edges from the scissors as well as the paper itself.
When working out how much excess to have at the other ends of your gift, it doesn’t matter too much as long as it’s more than half of the depth of the present. This is much easier to judge by eye than the other measurement.

Step 3: folding and taping
Clear the rest of the wrapping paper away for now, have a stretch and a take deep breath – we’re over halfway there!
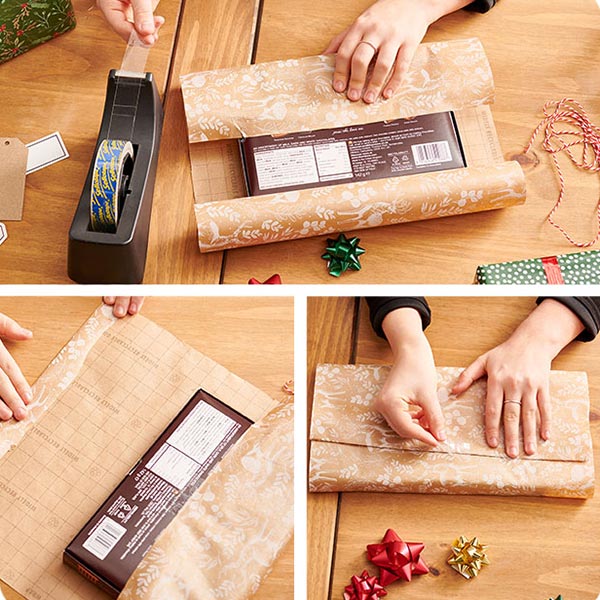
Place your gift upside-down in the centre of your expertly measured paper. Bring one of the longer edges to the centre of the gift, followed by the other side and overlap. Hold firmly in place before sticking them together with tape – this is where the pre-cut tape or dispenser comes in handy.

Step 4: folding the ends
Turning the present 45 degrees, fold the top piece of paper down so it sits flush against the end. Fold in both corners to meet the gift and press firmly to create those diagonal lines. Finally, lift the flap upwards and secure with tape.
This is the part which can take a little practice, but don’t worry: unless the recipient of your gift is a judge on ‘Britain’s Best Gift Wrapper’, they won’t mind if it’s a little messy.
Turn your wrapped gift over and take some time to appreciate your good work before moving onto the next present.

Step 5: finishing touches
After sticking a name tag onto your gift (or using a square from your wrapping paper), you can dress the wrapped gift up even further with some ribbon for that classic Christmas present look.
Simply wrap your ribbon around the gift lengthways, cross the ends underneath at 90 degrees and bring them back to the top, so they meet in the middle. Tie the ends into a bow.
You can curl the excess pieces of ribbon by holding it firmly between your thumb and the edge of your scissors, pulling the ribbon through tightly to create a curl.
Other decorations can be added at this point like bows and stars. Let your festive imagination run wild!
For extra-special gifts, you could even use tinsel instead of ribbon for an extra-festive appearance.
Wrapping gifts without paper
Let’s face it, if your gift isn’t shaped like a box, wrapping it becomes more difficult.
Save yourself some time (and frustration) by using gift bags or gift boxes to cover any pressies with awkward shapes. Not only does this make your life easier, but they can also be reused next year.
If your chosen gift arrives in a box which looks nice, you could also skip wrapping it entirely and simply finish with some ribbon. Sometimes, simplicity is key!
Any gift wrapping tips you’d like to share? Do you know how to wrap a football? We’d love to hear from you on Facebook, Instagram or X or TikTok.
For more Christmas inspiration, visit our Christmas Ideas & Advice page